
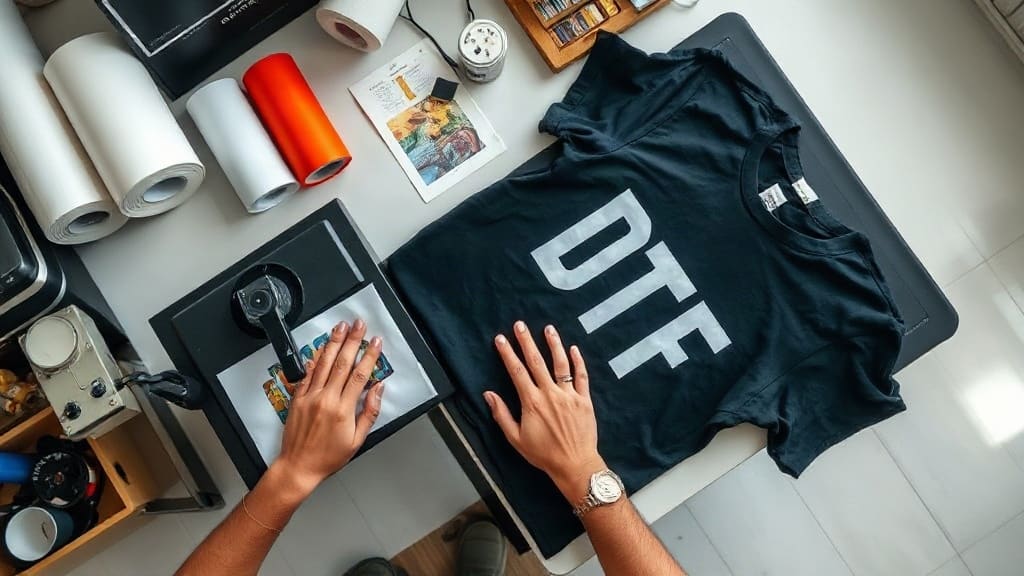
If you are exploring custom apparel printing, you have likely heard about DTF transfers. This method has transformed how small businesses and hobbyists create vibrant, durable designs on garments. Unlike traditional screen printing, DTF (Direct to Film) offers a flexible, cost-effective way to produce custom shirts, hoodies, and even bags. In this guide, I will walk you through the entire process, share practical tips from my own experience, and help you decide if this technique is right for your projects. Let me start with the basics and then dive into the details that matter most for achieving professional results.
What Are DTF Transfers?
DTF transfers involve printing a design onto a special PET film using a printer equipped with white ink. After printing, a hot-melt adhesive powder is applied to the wet ink, and the film is cured to activate the adhesive. The result is a transfer that can be stored and later pressed onto fabric using heat. This process differs from Direct to Garment (DTG) printing because the design is first created on a film, not directly on the shirt. That difference gives DTF transfers a unique advantage: you can print multiple copies of the same design in advance and apply them whenever needed, without tying up your printer for long runs.
The film itself is typically coated to accept ink, and the adhesive powder is what bonds the design to the fabric. When you apply heat and pressure, the powder melts and creates a permanent bond. One of the best parts is that DTF works on both cotton and synthetic fabrics like polyester, which is a big plus compared to some other methods.
Why Choose DTF Transfers Over Other Methods?
There are several reasons why DTF transfers have gained popularity. First, they offer excellent color vibrancy and detail. Because you print onto a film with a white underbase, colors appear bright even on dark shirts. Second, the transfer is very durable. When applied correctly, it can withstand repeated washing without cracking or fading. Third, the process is efficient for small batches and custom orders. You can print one design or a hundred, and the cost per unit remains reasonable. Finally, DTF transfers are easy to store. You can produce a bunch of transfers in advance and use them as orders come in, which is great for maintaining stock.
Compared to vinyl heat transfer, DTF offers more flexibility because you can print full-color gradients and intricate graphics without cutting complex vinyl layers. Compared to DTG, DTF doesn't require expensive pretreatment for each shirt, and it works on a wider variety of fabrics.
How to Make DTF Transfers: Step-by-Step
Creating your own DTF transfers at home or in a small studio is possible if you have the right equipment. Here is a typical workflow based on my own trials and errors.
Step 1: Design Your Artwork
Start with a high-resolution image in RGB color mode. Use design software like Adobe Illustrator or Photoshop. Ensure your design has a transparent background, because the white ink layer will act as the base for colors. Keep in mind that DTF printing processes colors differently than a standard desktop printer, so you may need to adjust brightness and contrast.
Step 2: Print onto DTF Film
Load the PET film into a compatible printer. The printer must have a white ink channel. Many users convert Epson or other inkjet printers with a white ink system. Print your design in reverse (mirrored) if your film is not already oriented. The film has a coated side that accepts ink, so make sure you print on that side.
Step 3: Apply Adhesive Powder
Immediately after printing, while the ink is still wet, sprinkle a fine layer of hot-melt adhesive powder over the entire printed area. This powder is usually made from a thermoplastic polyurethane. Shake off the excess powder. The powder should only stick to the wet ink, so areas without ink will remain clean.
Step 4: Cure the Powder
Place the film into a curing oven or use a heat press with a temperature around 160°C (320°F) for about 60 seconds. This melts the powder and fuses it with the ink. After curing, let the film cool. The transfer is now ready for application, or you can store it for later.
Step 5: Apply the Transfer to Fabric
To transfer the design onto a garment, preheat your heat press to about 160°C (320°F). Place the transfer film with the design facing down on the fabric. Press with medium to firm pressure for 10 to 15 seconds. Peel the film while it is still hot if using hot peel film, or let it cool if using cold peel. Your garment is ready.
Essential Equipment and Materials
To start making DTF transfers, you need a few key items. A DTF printer is the most significant investment. Look for one with a reliable white ink system, such as those based on Epson XP printers with converted ink. You will also need PET film rolls, DTF adhesive powder, and a heat press (if you do not have one). A curing oven is helpful, but some people use their heat press to cure the powder by placing the film on a plate with a sheet of Teflon. In my experience, buying a dedicated curing unit saves time and gives consistent results.
When purchasing supplies, choose high-quality films and powders. Cheap materials often lead to cracking or poor adhesion. I recommend testing different brands to find what works best for your printer and climate.
Costs and Profitability of DTF Transfers
One of the first questions I had was about costs. The initial setup can be expensive, but the per-unit cost drops as you produce more. A basic DTF printer setup might cost between $1,500 and $3,000, including the printer, ink, and films. Consumables like film and powder add a small cost per transfer, usually a few cents per square foot. If you are selling custom shirts for $25 or more, your profit margin can be substantial after covering the transfer cost, which might be around $1 to $2 per design depending on size.
For small businesses, DTF transfers are a smart way to offer on-demand custom apparel without holding inventory. You can print transfers for multiple orders in one session and apply them as needed. That flexibility reduces waste and upfront investment.
Design Tips for Stunning DTF Transfers
Creating eye-catching designs requires more than just a good image. Here are some tips that have helped me produce professional-looking transfers.
Keep the Design Within Safe Areas
Since the transfer is applied with heat and pressure, edges can shift slightly. Leave at least 1 cm margin around your design to avoid any mishaps.
Use High-Contrast Colors
When printing on dark shirts, your design must have a white underbase. Therefore, adjust your design to ensure that text is legible and colors are vibrant. Avoid thin lines that may be lost during the process.
Mirror Your Design
If your film is not pre-printed with a guide, remember to flip your design horizontally before printing. Otherwise, your final print will be reversed.
Test with a Sample
Always do a test transfer on a piece of scrap fabric before committing to a batch. Adjust press time, temperature, and pressure as needed. Different fabrics absorb heat differently.
Common Mistakes and How to Avoid Them
When I first started, I encountered several issues that frustrated me. One major problem was poor adhesion, which happened because I used too little powder or pressed for too short a time. Another issue was cracking after washing, which often results from over-curing or using low-quality powder. To avoid these, follow the manufacturer's recommendations for your powder and always press with even pressure. Also, make sure the fabric is smooth and free of wrinkles before pressing.
Another mistake is using a design with too much detail. DTF can handle complicated graphics, but if you have very small text, it may not transfer cleanly. In that case, increase the text size or simplify the design.
DTF Transfers vs. Other Printing Methods
It is helpful to compare DTF transfers to other popular methods so you can make an informed choice. Screen printing is excellent for large quantities of solid-color designs, but it requires bulky screens and a larger investment. DTG is great for detailed prints on cotton, but it is slower and less effective on polyester. Vinyl cutting is simple but limits you to solid colors. DTF combines the best of these, offering full-color, durable prints on various fabrics with a simple process.
If you are a small business, DTF allows you to produce professional-looking custom apparel without outsourcing. You have full control over quality and turnaround time.
Frequently Asked Questions
Can DTF transfers be used on any fabric?
Yes, DTF transfers work well on cotton, polyester, blends, and even some nylons. However, for very stretchy fabrics like spandex, you might need a special stretchable film or powder. Always test a sample first.
How do I wash garments with DTF transfers?
Turn the garment inside out and wash in cold water with mild detergent. Avoid using bleach. Tumble dry on low or hang dry. This helps preserve the transfer for many washes.
What is the shelf life of a DTF transfer?
If stored in a cool, dry place away from direct sunlight, a DTF transfer can last for months or even years. The adhesive is stable until activated by heat.
Do I need a special printer for DTF?
Yes, you need a printer that can print white ink. Standard inkjet printers do not have white ink. You can convert certain Epson models, but it is easier to buy a dedicated DTF printer.
Is DTF printing expensive to start?
The initial investment can be around $2,000, but you can start with a smaller setup if you are on a budget. As you grow, you can upgrade. Many entrepreneurs find the cost worthwhile because of the high profit margins.
Final Thoughts
DTF transfers have opened up a world of possibilities for custom apparel printing. Whether you are a hobbyist or a business owner, this technique offers flexibility, durability, and vibrant results. I hope this guide has given you a clear understanding of the process and the confidence to try it yourself. Start with a small batch, experiment with different settings, and soon you will be producing professional-quality transfers that impress your customers.